Each environment and team has its own layout. Changes you make in development don’t affect production until you deploy them.
Accessing the layout editor
To enter Layout Editor mode, click the Layout Editor toggle in the top navigation bar of your back-office. A purple banner appears when the mode is active, any changes you make are saved automatically as a draft.Showing and ordering collections
With Layout Editor mode on, you control which collections appear in the navigation and in what order:- Show/hide collections, click the eye icon next to a collection to toggle it. Hide the collections that aren’t relevant to your operational team.
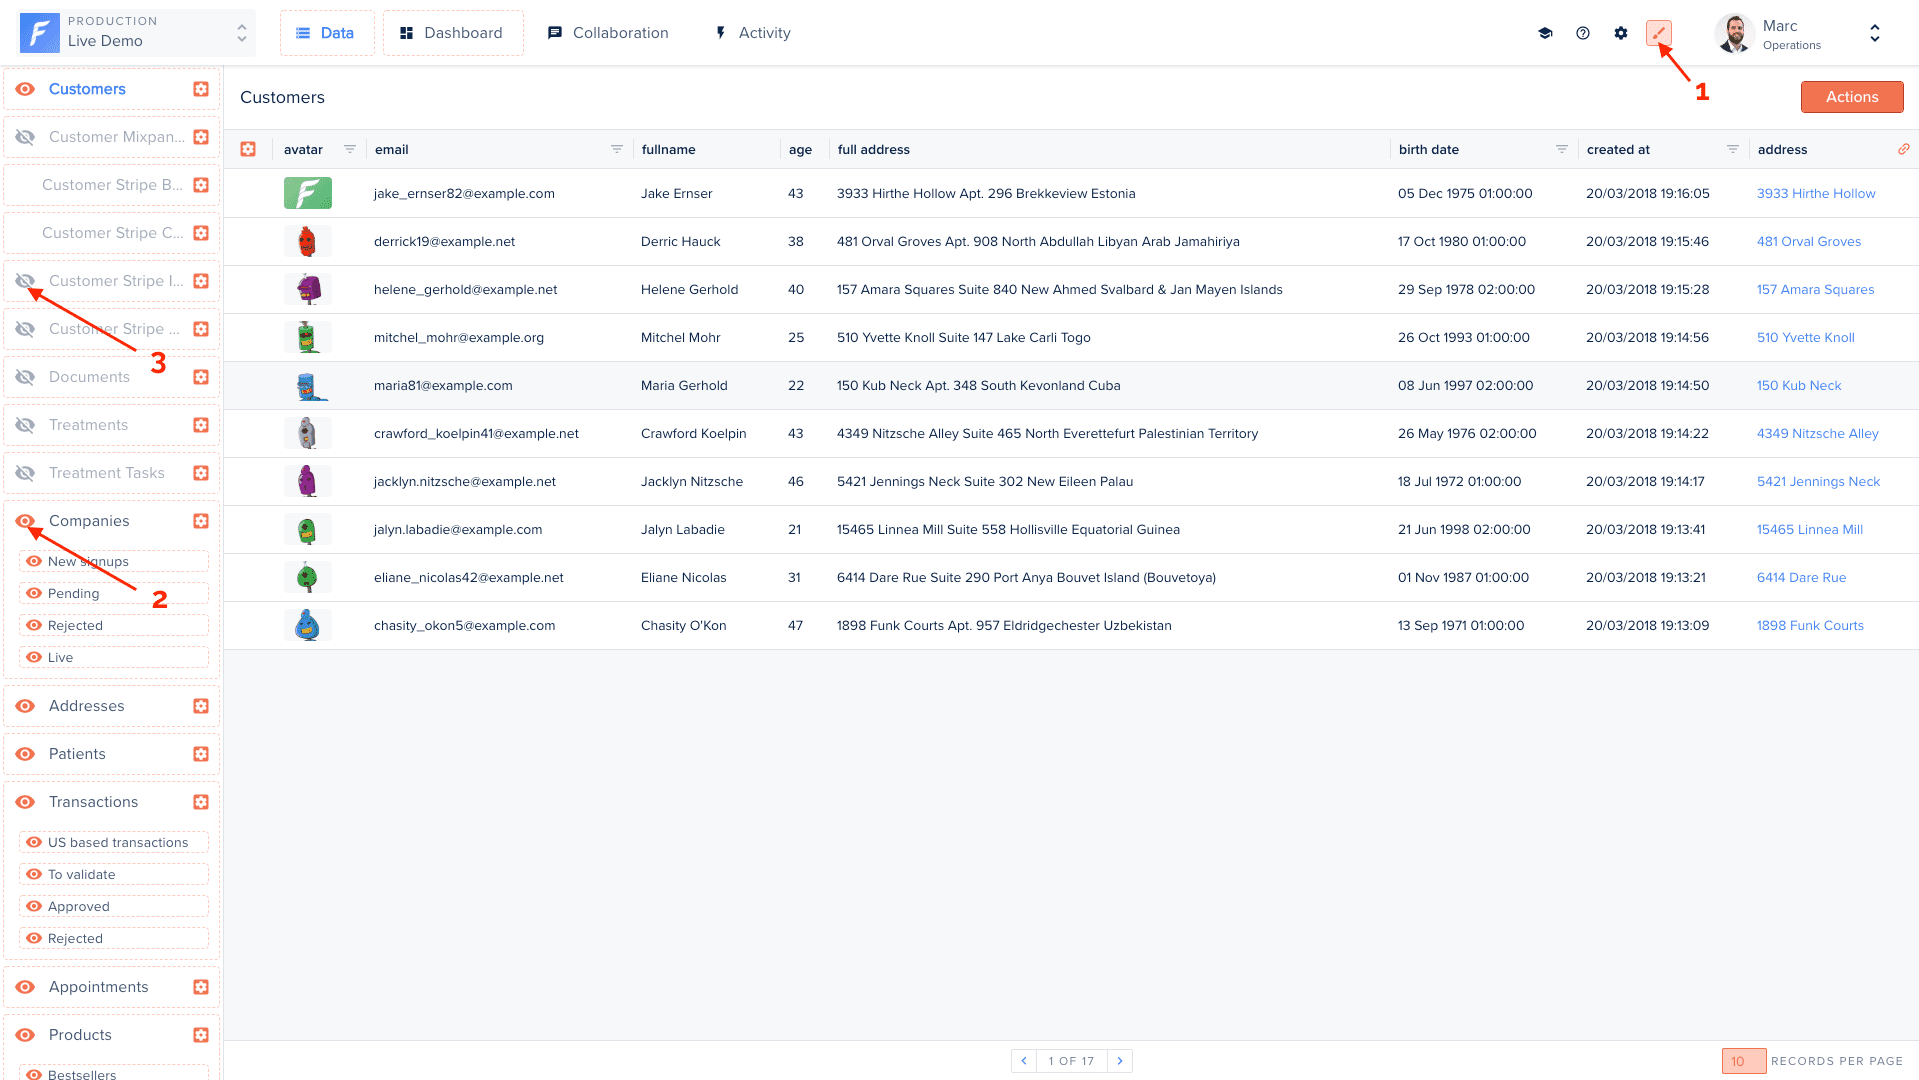
Toggle a collection's visibility with the eye icon
- Reorder collections, editable elements are surrounded by dotted lines; drag and drop them to change the order.
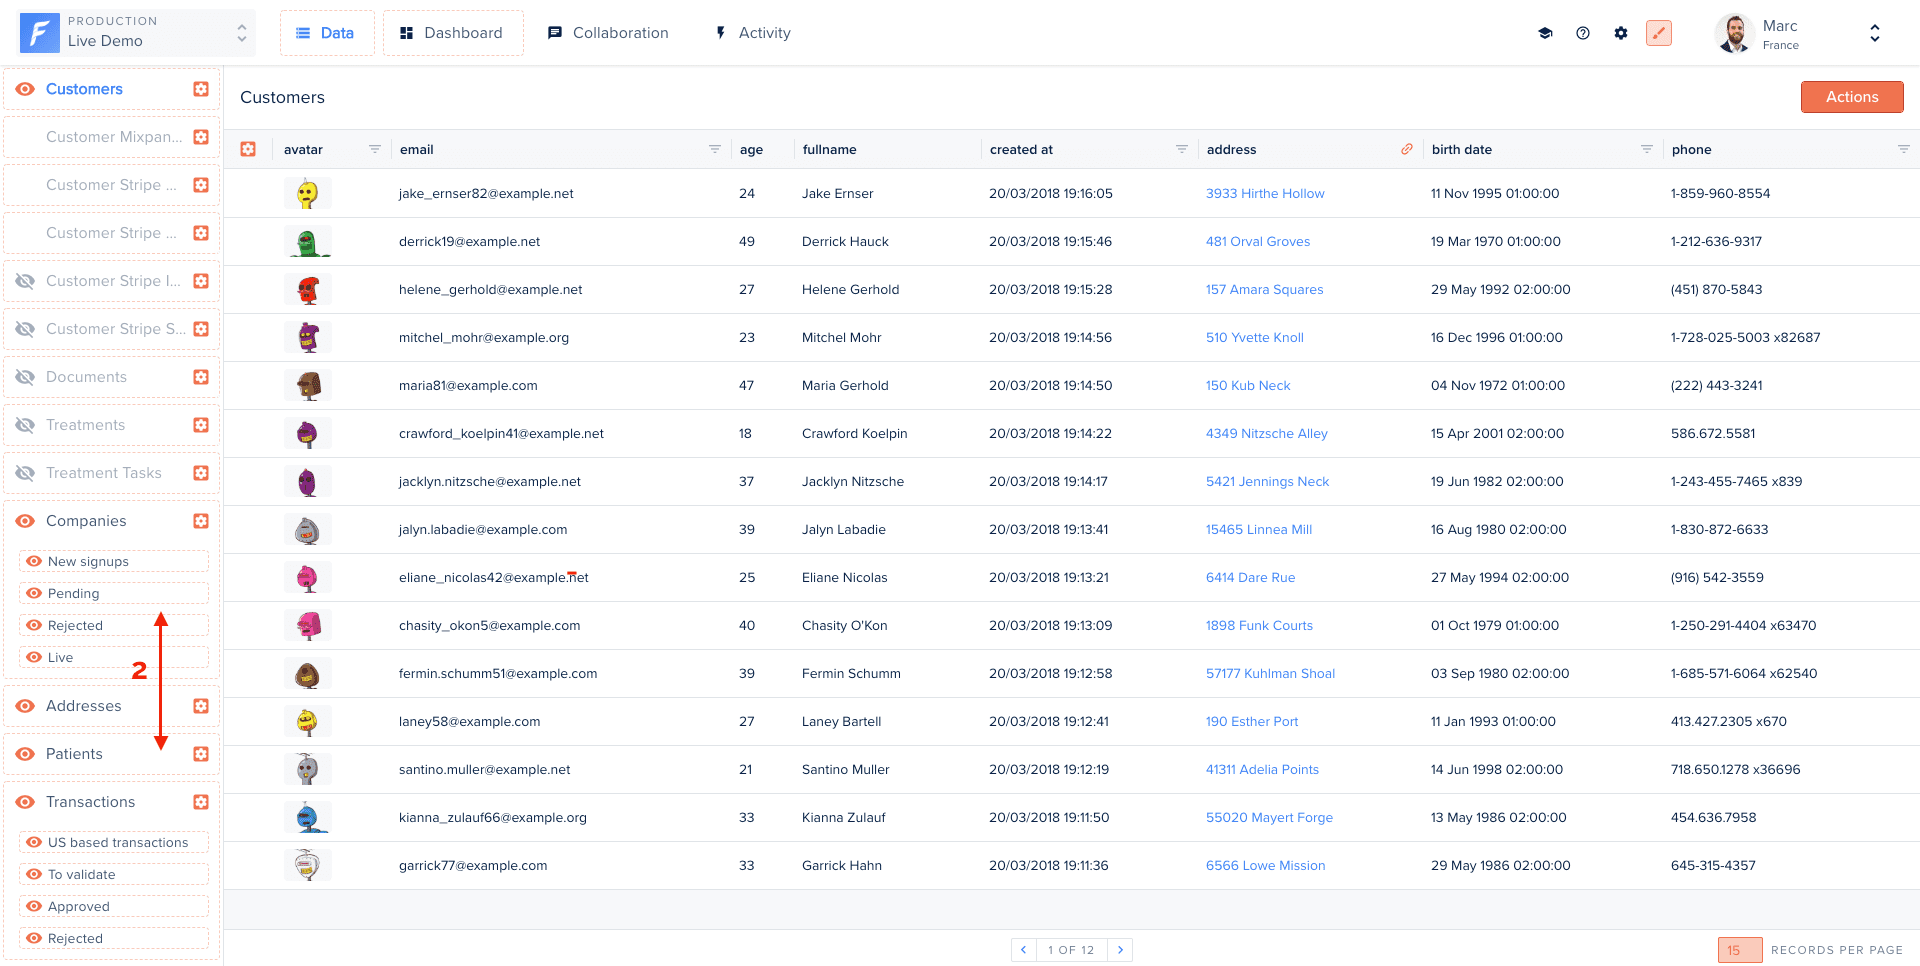
Drag and drop collections to reorder them
- Reorder tabs / change the default tab, by default Forest opens on the Dashboard tab. Drag the tabs (for example move the “Data” tab) to change their order and the default landing tab.
Reorder tabs to change the default landing tab
Customizing the table view
The table view is what operators see when browsing a collection. In Layout Editor mode:- Show/hide columns, click the eye icon next to any field to toggle its visibility
- Reorder columns, drag and drop column headers to rearrange them
- Resize columns, drag column borders to adjust width
- Set default sort, click a column header to define the default sort order and direction
Customizing the detail view
The detail view shows when an operator opens a single record. Reorganize fields to match your team’s workflow:- Drag fields to reorder them on the page
- Create sections to group related fields under a heading
- Add tabs to separate different areas of information (e.g. “Profile”, “Billing”, “Activity”)
- Hide fields that operators don’t need to see on this view
- Configure related data panels, choose which relationships appear and how they’re displayed
Sections and tabs
Sections help organize long detail views. To add a section:- Click Add section in the Layout Editor sidebar
- Give it a label
- Drag fields into the section
Summary view
The Summary view is a curated, presentation-oriented view of a single record. Once configured for a collection, it becomes the default entry point when an operator opens one of its records. To create one, open a record, go to the Summary tab and click Add one (if a Summary view already exists, reconfigure it from Layout Editor mode).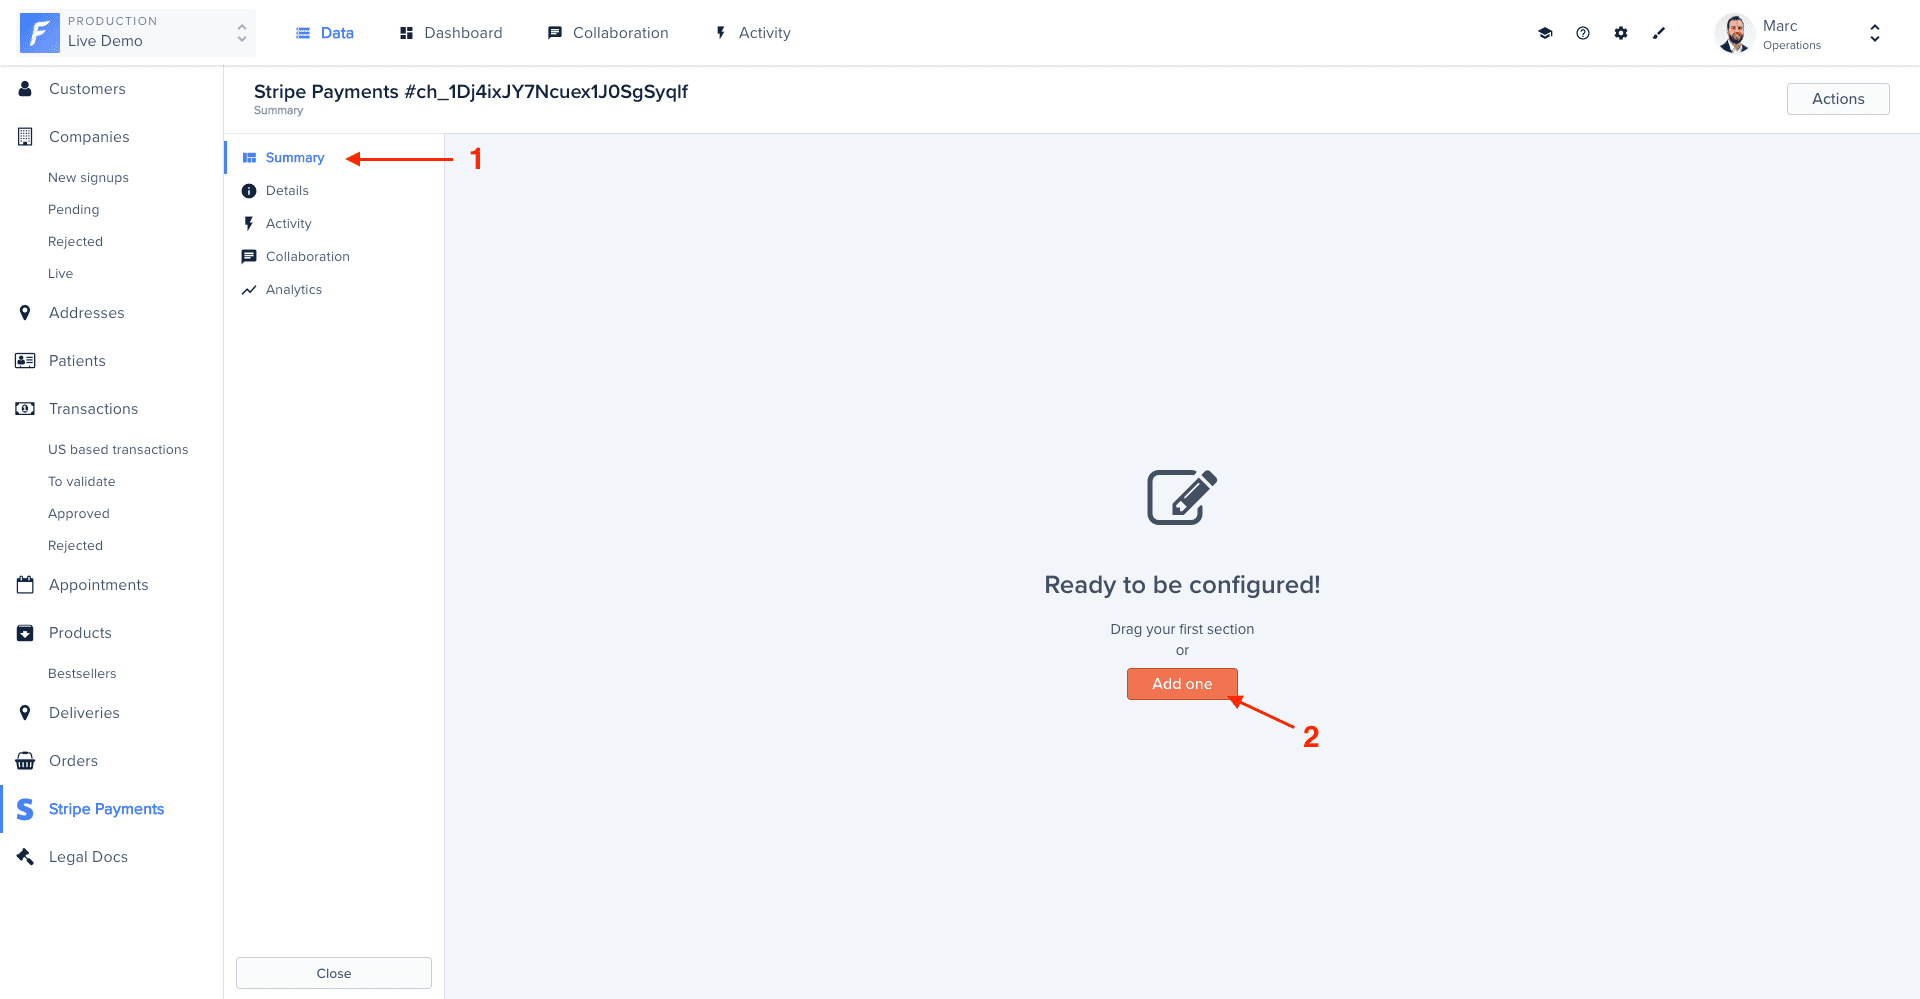
Create a Summary view from the Summary tab
- Formatting, add a Section and drop fields into it to structure the layout.
- Fields, the record’s own fields.
- Related data, the record’s relationships (for example a customer’s
Orders); drag them in like any other module. - Actions, insert any of the collection’s actions directly into a section, so operators can act on the record straight from the Summary.
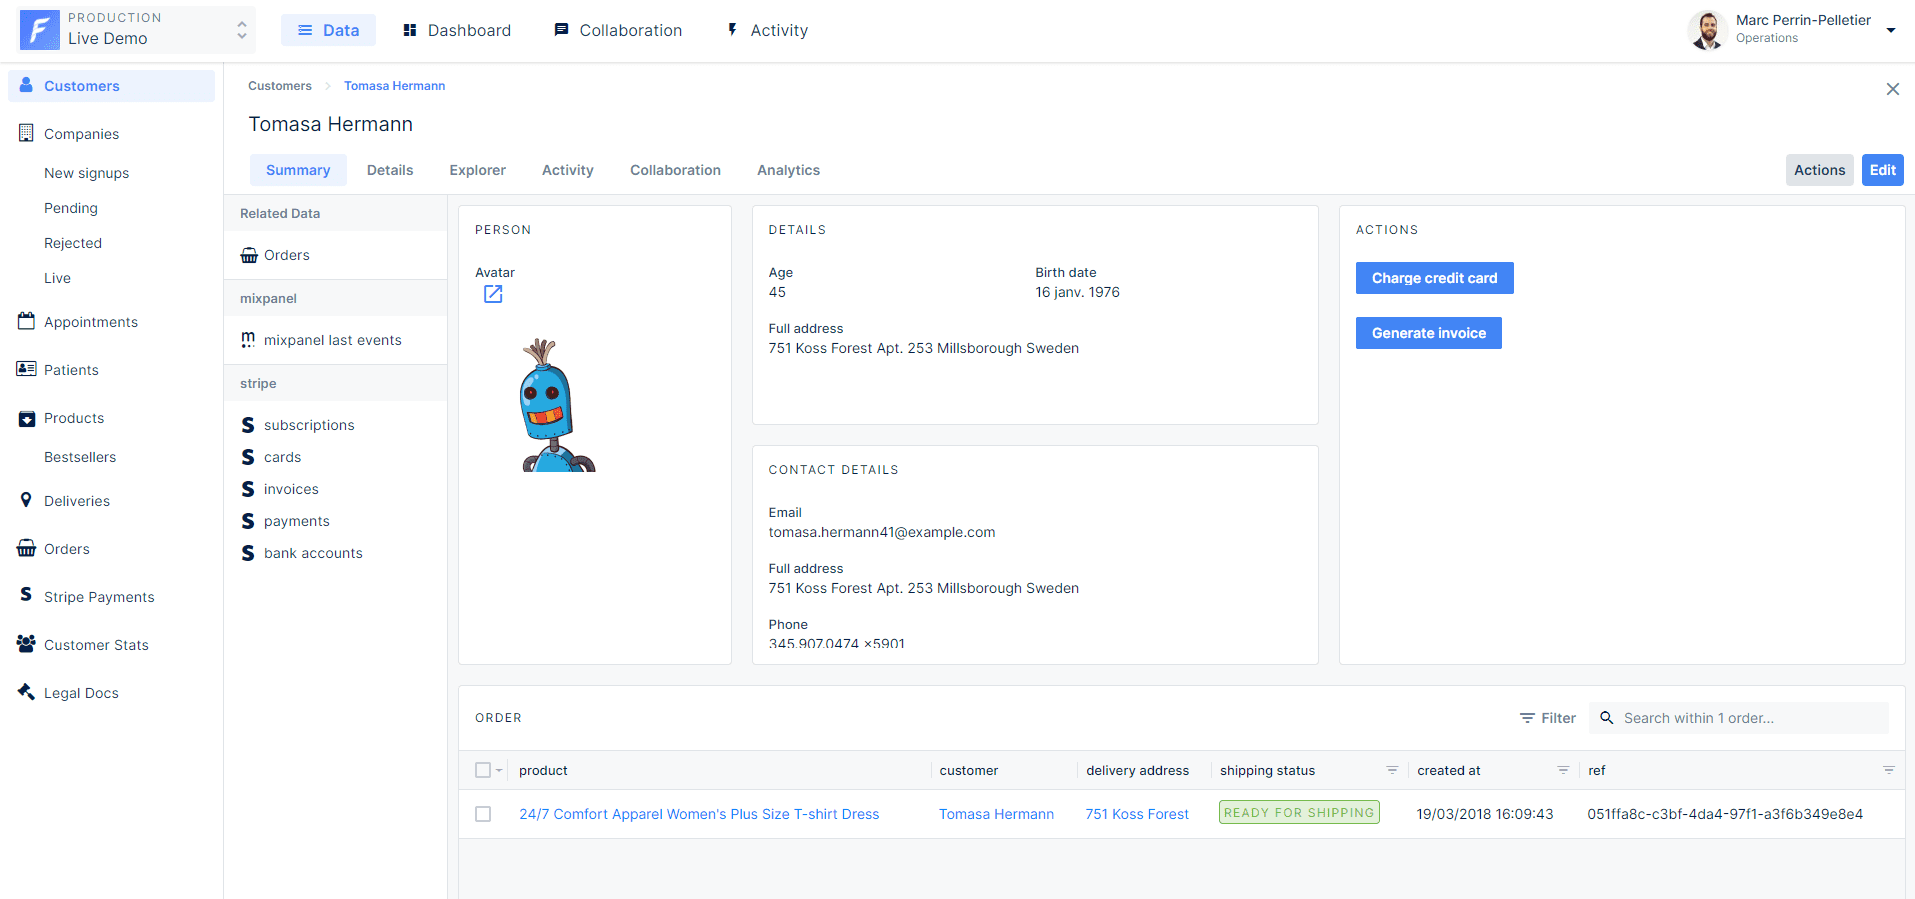
The Summary view visual builder
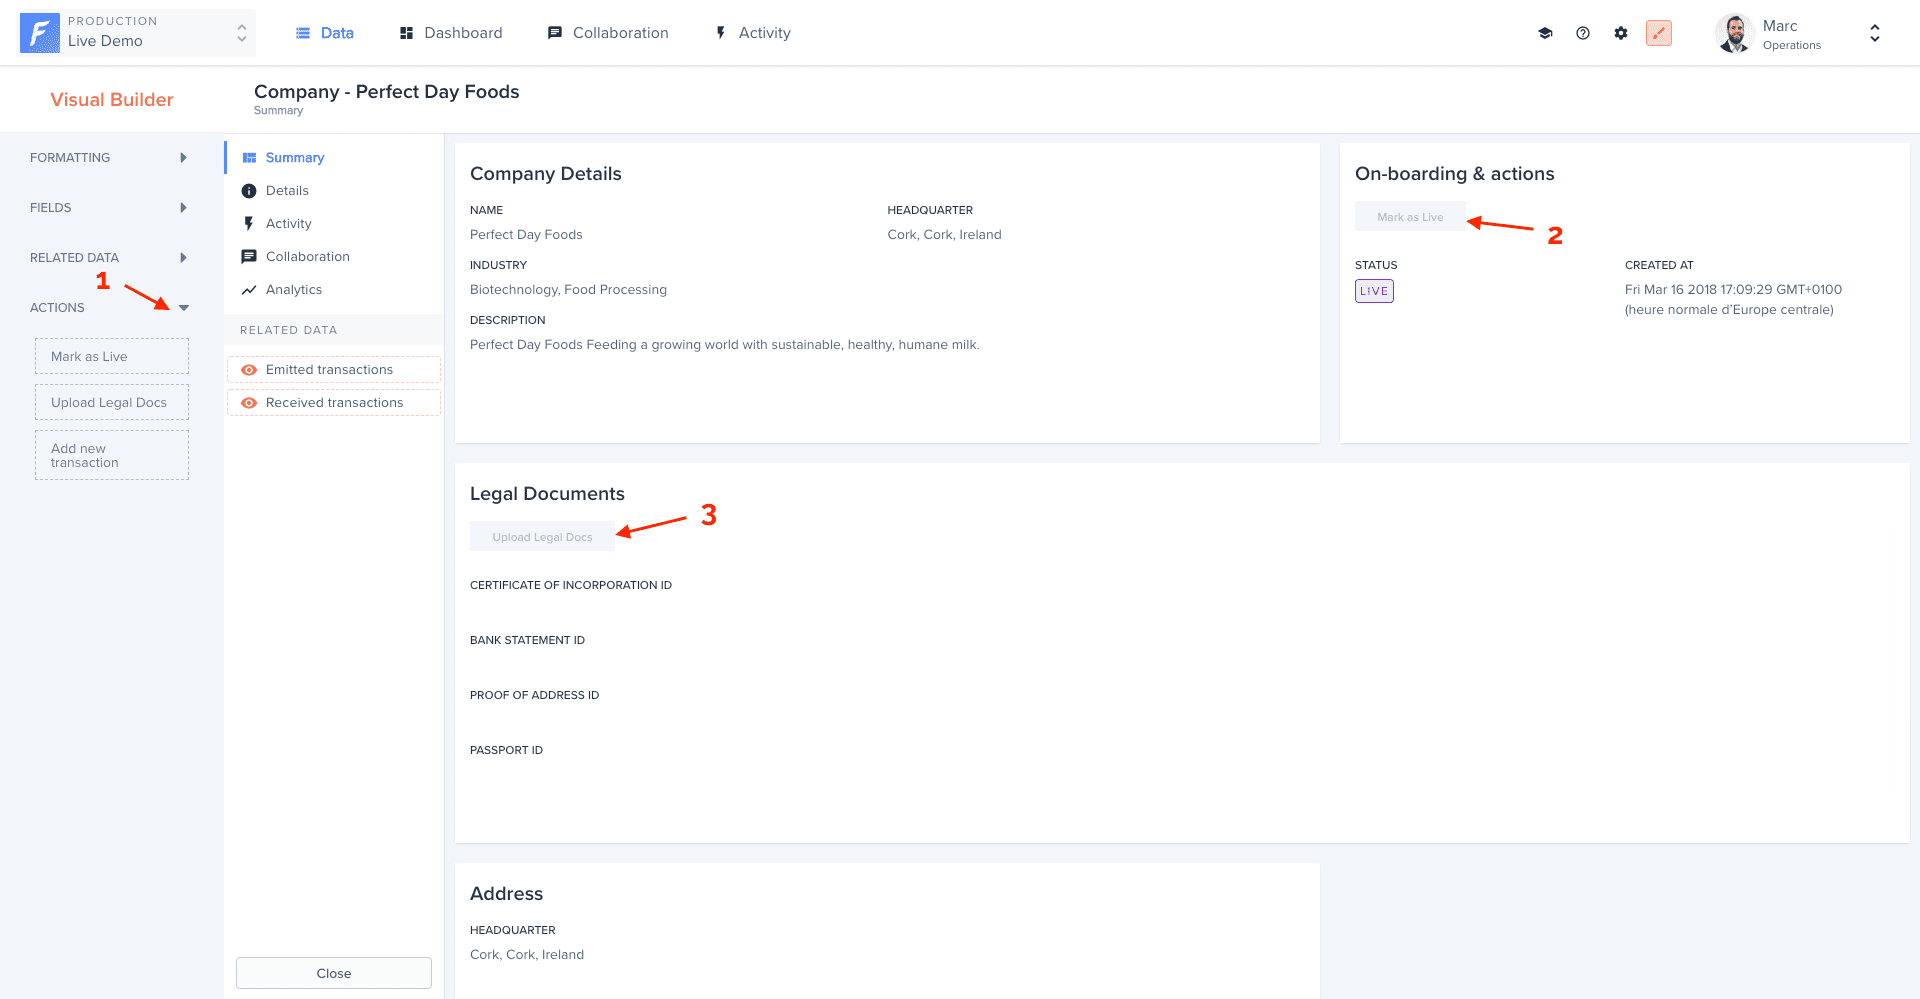
Insert actions so operators can act on the record from the Summary
Explorer view
The Explorer tab lets operators browse linked collections, even across relationships that are several levels deep, and edit, add, or associate records from there.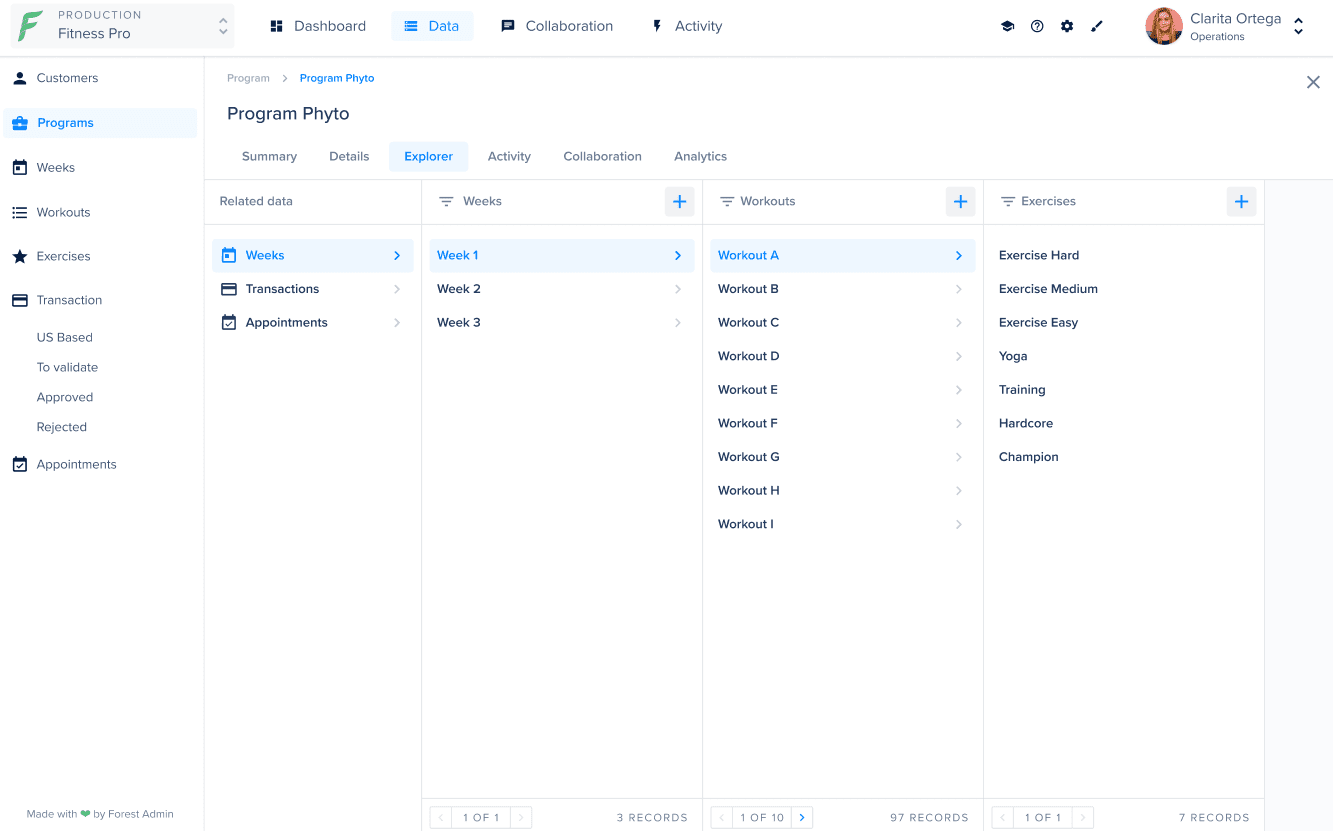
Browsing linked collections from the Explorer tab
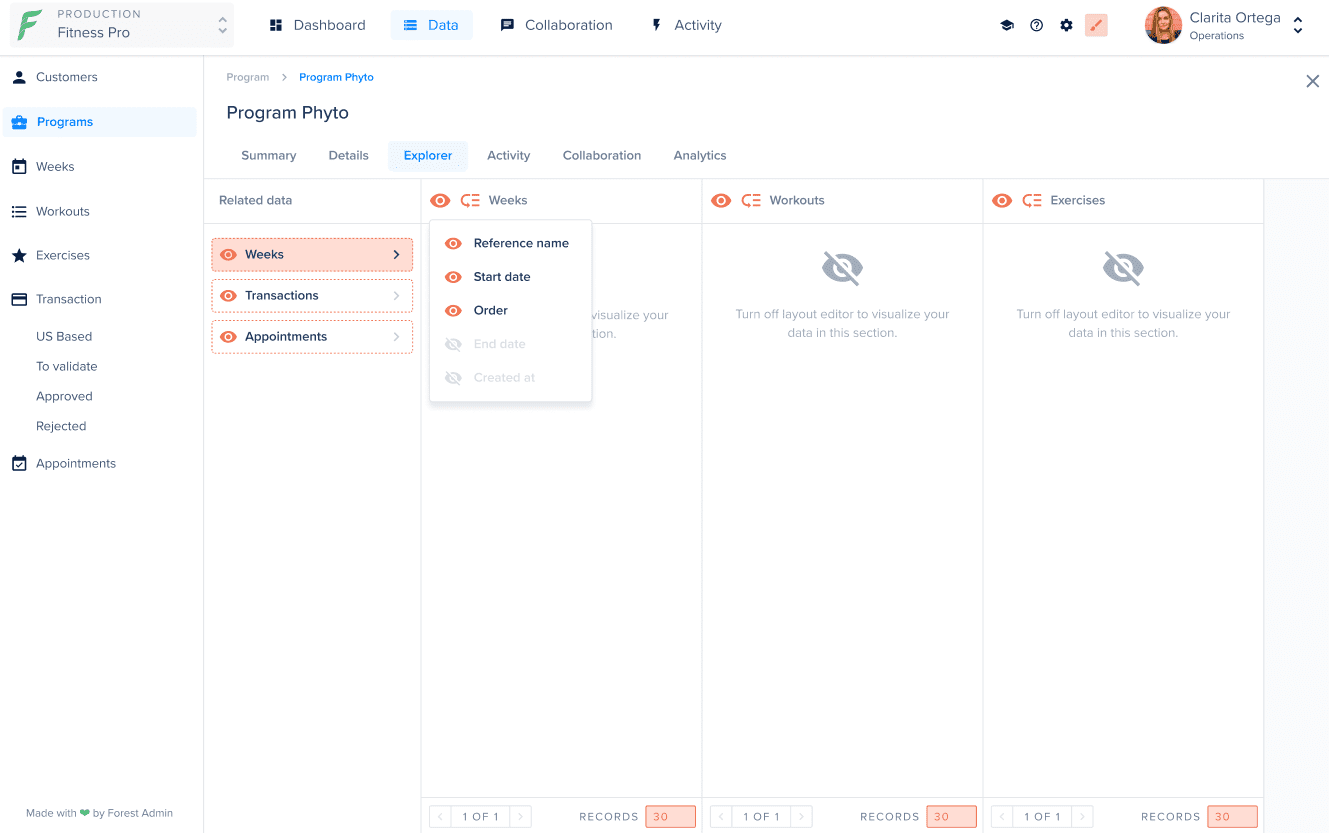
Choosing which collections and fields appear in the Explorer
Customizing forms
Create and edit forms are configured separately from the detail view, giving you full control over the data entry experience. In the Layout Editor, switch to “New record” or “Edit record” view using the selector at the top, then:- Reorder fields to match the natural flow of data entry
- Group fields into logical sections (e.g. “Contact info”, “Address”)
- Set field visibility, hide fields that should never appear in forms
- Mark fields as read-only in edit mode when they shouldn’t be changed after creation